Have you ever wondered how to successfully couple and decouple model railway carriages while on the move? Well, we receive a large number of inquiries from model railway enthusiasts asking this very question.
With so many inquiries we set out to create our very own model railway magnetic coupling system to recommend to our many enthusiastic customers.
A quick search of the world wide web will produce a handful of tutorials showing you how to use magnets to decouple trains but on very specific coupling types. Our method of magnetic decoupling can be fitted and used on almost all types of train couplers.
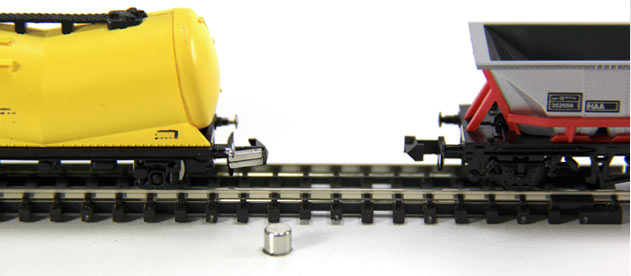
Our coupling system was created by attaching two MOD1 magnets to the coupling element of the train and placing a single F408 magnet embedded into the ground underneath the train track.
As the train passed over the large magnet (F408) it attracted the two smaller magnets pulling the coupling downwards and allowing the two carriages to separate while on the move.
Depending on the type of model railway set you have you will need to take time and care when positioning the large magnet under the track, getting the right distance between the two magnets is essential for a smooth carriage decoupling.
To attach the small MOD1 magnets to your trainer couplings simply apply a small amount of Araldite or Loctite adhesive to the magnets and position them on the coupling, this will form a long-lasting bond.
To embed the larger F408 magnet into your train layout a 4mm drill will be required to create a whole with a maximum depth of 8-9mm depending on the distance you require between the two magnets.